Quantcast
Channel: LucyRavenscar - Crochet Creatures
Viewing all 126 articles
Browse latest View live

Quick and Easy Easter Bunny - free pattern!

$
0
0

Whilst I was making the Little Teddies from the previous post, I realised it wouldn't take much turn them into little bunnies. They don't take very long to make, and you only need scraps of yarn, so they're perfect little extras to make for an Easter basket. I made a couple using pastel self-striping yarn, which seemed nice and spring-like, then I made one in brown yarn to be a little chocolate bunny.


Easter Bunny

 
This little bunny will end up about 4.5 cm/1.75" tall, not including ears, depending on the yarn you use.
 
Abbreviations:
ch = chain
st = stitch or stitches
ss = slip stitch
sc = single crochet (US), double crochet (UK)
dc = double crochet (US), treble crochet (UK)
tog = together
sc2tog = decrease by working two sc together
pop = popcorn (see special stitch instructions)
FO = fasten off

General instructions:
Work in rounds unless otherwise stated and do not join rounds unless told to. Use a stitch marker to mark the start of a round - a small piece of different coloured yarn placed under the stitch at the start of the round will do. To start a round, you can use the magic ring method, but I prefer (ch 2, work 6 sc into 1stch). The first ch is a slip knot so it will expand and if you work the 6 sc over the tail of yarn as well you can use that to pull the hole tight.

Work through both loops of stitches unless otherwise indicated.
 
Special stitch instructions:

3 dc pop: popcorn stitch for tail. Work 3 dc into 1 st, take hook out leaving loop, put hook through 1st dc & pull loop through.
(When changing colour for the tail work the sc before the change until there are two loops left on the hook. Then use the new colour for the final yarn over hook and pull through. When changing back to the main colour after doing a 3dc pop work the last dc of the popcorn until there are two loops left on the hook. Then use the main colour for the final yarn over hook and pull through. Finish making the popcorn st and you will have the main colour on your hook for the next stitch.)

4 dc pop: popcorn stitch for arms and legs. Work 4 dc into 1 st, take hook out leaving loop, put hook through 1st dc & pull loop through.

You will need:
Small amount of yarn, any colour you like, in double knitting or worsted weight.
Small amount of white or cream yarn for tail.
Small amount of black yarn (or cream and pink for chocolate bunny) for eyes and mouth.
Small amount of stuffing.
3.5mm (E) hook.
 

Round 1: Ch 2, work 6 sc into 1st ch - 6 st.
Round 2: [2 sc in next st, (sc and ss into next st, (ear) ch 6, sc into 2nd ch from hook, dc into next 3 ch, sc into next ch, ss back into original st), 2 sc in next st] 2 times - 12 st (the ss used to start the ear counts as a st, and you will work into it on the next round).
Round 3: [2 sc in next st, sc in next st] 6 times – 18 st.

Round 4 - 6: (3 rounds) Sc in each st around - 18 st.
Round 7: [Sc2tog, sc in next st] 6 times – 12 st.
Round 8: [Sc2tog, sc in next 2 st] 3 times – 9 st.
Round 9: [2 sc in next st, sc in next 2 st] 3 times – 12 st.
Round 10: Sc in next 5 st, 4dc pop, sc in next 4 st, 4dc pop, sc in next st - 12 st.
Round 11 - 12: Sc in each st around - 12 st.
Round 13: [2 sc in next st, sc in next 3 st] 3 times – 15 st.
Round 14: Sc in next 4 st, change to tail colour yarn, 3dc pop, change back to main yarn, sc in next 4 st, 4dc pop, sc in next 3 st, 4dc pop, sc in next st - 15 st.
Round 15: [Sc2tog, sc in next 3 st] 3 times – 12 st.
Round 16: [Sc2tog] 6 times – 6 sc. FO, leaving a length of yarn.
 
Stuff head and body and embroider features. Use length of yarn to sew up hole at bottom, pulling yarn upwards through body to make sure the bottom is flat. You can also use this yarn to sew a stitch or two at the bottom of each ear to make sure they're pointing forwards.


Adorable Alpacas

$
0
0
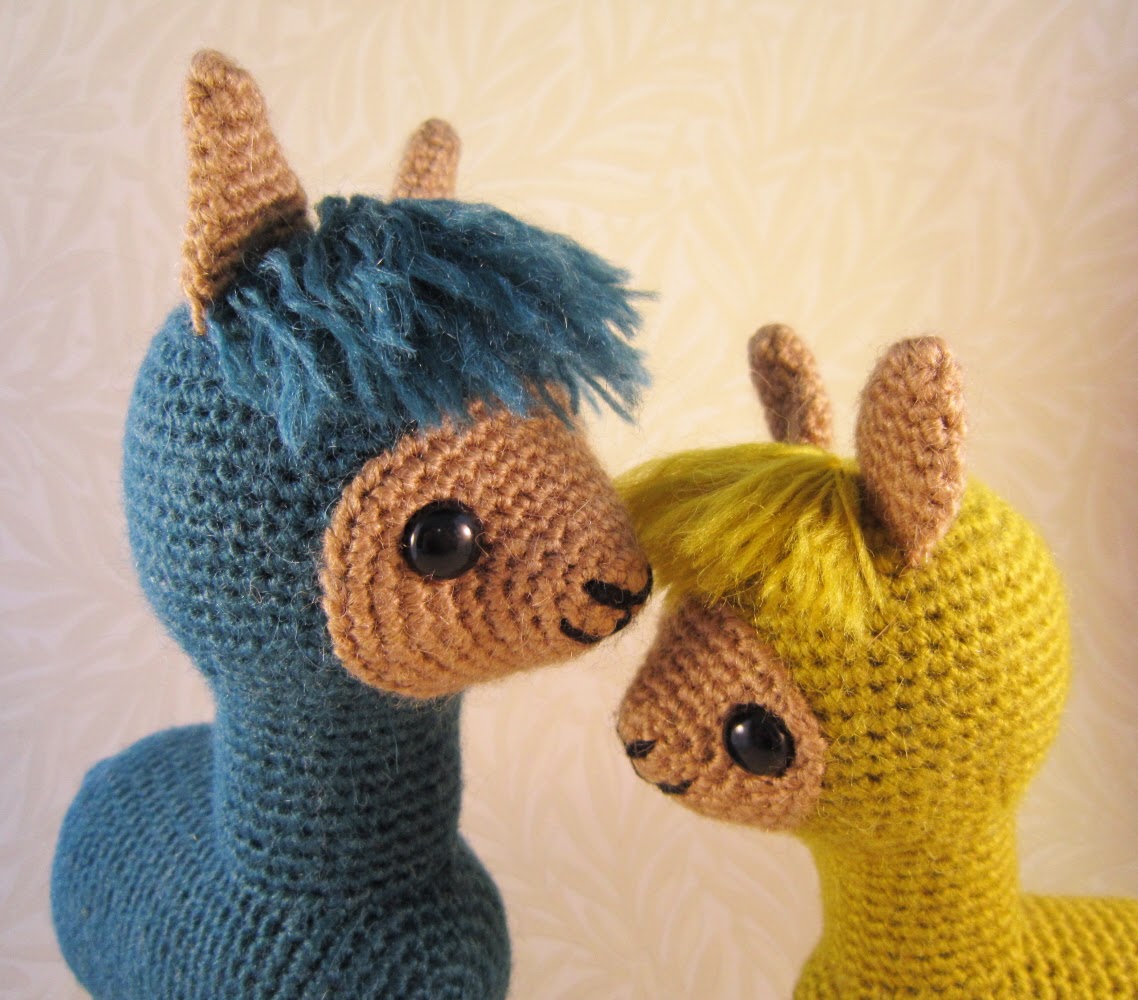
Recently I was asked by Practical Publishing to design some alpaca patterns for their Crochet Gifts magazine/bookazine. I've been away for the weekend, and I came back to find that the magazine had arrived (I think it's due out in the shops on 24th April), and I was delighted to find my colourful alpacas on the front cover!


They're made using Stylecraft Alpaca DK, an acrylic yarn with some alpaca wool mixed in, which makes it lovely and soft. There are two sizes of alpaca you can make, an adult and a baby, and you can make them in natural colours, or make them in fun, bright colours as I did.

Having just had a skim through the magazine it's full of interesting projects including lots of lovely toys and accessories (I definitely want to try the leather and crochet bracelet), so I'm really pleased my patterns are in there.

Hollywood Crochet

$
0
0
I'm afraid I haven't been updating this blog very often recently, but that's because I've been working on commissions that I can't talk about until they're finished, which is quite frustrating. Last year I worked on a pattern book, Hollywood Crochet, and created patterns for six Hollywood stars. There were some delays with the book coming out - it comes with the yarn to make one of the figures, and unfortunately there wasn't enough yarn in there originally - but now that's been sorted out and it's available to buy I thought I'd post about it.


The patterns are for Elvis (with yarn), Audrey Hepburn, Marilyn Monroe, James Bond (Daniel Craig), and Kate Winslet and Leonardo DiCapprio in their roles from Titanic. It was fun working out all the figures, particularly trying to do different styles of hair using various crochet techniques, and I was especially happy with the way Marilyn's iconic dress came out.


The book is published by Parragon Books, just search online to see where you can buy it depending on where you live.

The Craft Club Charity Yarnbomb

$
0
0
If you crochet or knit you've probably come across the concept of yarnbombing, where you decorate an outdoor space with a bit of crochet or knitting. I've always thought it was a cool thing to do, but haven't tried it myself yet. However, now I and anyone else who wants to can join in with a charity yarnbomb organised by The Craft Club in Essex. They are asking anyone who can crochet to try to help them break the world record for the largest display of crochet sculptures. They need 4061 items which will be displayed in the Little Havens Hospice Garden on 25 August 2014. Here's the details:

"We want to creater a magical garden scene for the children to discover, and so our theme is Enid Blyton's The Magic Faraway Tree stories. Any crocheted items that fit our theme would be welcome... woodland creatures such as hedgehogs, squirrels, rabbits and owls, fantastical characters such as goblins, fairies and troll, flora such as flowers, cherries, acorns, strawberries and mushrooms."


You can contact them for more information (see the poster above for the email) and you can  find them on Facebook: https://www.facebook.com/thecraftclubyarnbomb/timeline

I've got lots of free patterns that should be perfect for this, and most of them are small, so they'd be quick to work up. Here are some ideas, click on the patterns on the list to the right for the details of each pattern.

All the Totoros:


Mini Fuzzy-haired Troll:


Fierce Little Dragon:


Pet caterpillar or worm:


Tiny Rabbit:


Easter Bunny:


 Wizard's Owl:


Mini Frog:


I also have several patterns in my shop that would be good. I think I'll make a creature using the Little Folk pattern (https://www.etsy.com/uk/listing/85800576/pdf-of-little-folk-amigurumi-pattern-elf?):


I hope that's inspired some of you to make something (or things) to help with this, it'll be fun!

Exciting News!

$
0
0
Twelve of my Star Wars patterns are going to be appearing in a new Star Wars crochet pattern book! Published by becker&mayer! Books, it's due out in Spring 2015. I can't tell you much more than that at the moment, but I'll keep you updated with information as I get it.

I still have the five patterns below for sale on Etsy, just follow the link to my shop to see all the listings in detail.

Alpaca Family Pattern

$
0
0
My Alpaca Family pattern, which previously appeared in Crochet Gifts magazine, is now available in my Etsy shop.


With this pattern you make two sizes of alpaca, baby and adult. They've just been shorn, but they still have lovely floppy fringes. I used Stylecraft Alpaca DK, which is an acrylic yarn with 20% alpaca yarn in the mix, to give them a lovely soft feel. You can make them in fun bright colours, as I did, or use more natural shades.


 Make just one, a family, or a whole farm of them!


Yarnbomb Creatures

$
0
0
Back in June I posted about a charity yarnbomb that was taking place on 25th August. They were trying to break the world record for the largest display of crocheted items, in the process decorating the garden of a children's hospice. I managed to make a few things and send them along before I went on holiday, and I was delighted to discover that they smashed the record with 13388 items! The Craft Club have got lots of photos on their Facebook  page if you want to look, seeing so many adorable crocheted creations together is amazing.

Because I was a bit short of time, I found a few things I'd made previously and sent those along too, but I did manage to make a few new things. This little toadstool guy:

 
Three baby owls, using eyelash/fringe yarn:


And two Snorks, little friendly trolls, made using fun fur type yarn:


Pattern and Yarn Giveaway

$
0
0
I'm involved with a massive new giveaway where you stand the chance of winning crochet and knitting patterns, and all sorts of yarn. It's been organised by Melody's Makings - just click to go to her page to find out what you need to do to enter, and to check out all the prizes on offer.

If you win my prize, you will be able to choose from the patterns in my Etsy shop and pick any you want up to the value of £13.20 (over $21). That means you'd be able to select 4 or 5 of my patterns, such as:

Flora the Elephant

Adorable Monster

Flappy Owl

Tooterphants

Finn and Jake

 Halfling
 
Elf
 
I hope you'll want to enter this giveaway, and if you do, good luck!

Roman Soldier Amigurumi Pattern

$
0
0
There's a brand new pattern in my Etsy shop, a cute little Roman Soldier, with a choice of three different styles of armour. I've been working on this new pattern for a while now - I made the original way back in 2011 as a Christmas present for my nephew, who was really into the Romans. I was also a bit inspired at the time by Doctor Who, which featured the character Rory becoming an immortal Roman. I started to work on turning it into a pattern earlier this year but I got a bit side-tracked by various other projects. However, now I've finished all the work on it, and it's ready to buy.


The pattern lets you make a Roman Soldier, about 6.5" tall with a choice of three different styles of armour. There are also details to make a helmet, a sword and scabbard, and a cloak.


Living in Britain, I've always been interested in the Romans, who left an indelible mark on our country. We live quite close to two Roman villas, and I've really enjoyed taking my boys there, especially when they have re-enactment groups showing off their outfits and moves (and their legs!).


I think my little Roman would be prefect for anyone who's fascinated by Roman history, young or old, or for any Doctor Who fans who loved Rory in his Last Centurion persona.

Robin of Sherwood amigurumi

$
0
0

I'm a big fan of various SF and fantasy shows, and one of my favourites is Robin of Sherwood, the HTV/Showtime series from the 1980s. If you've never seen it, it's a wonderful take on the Robin Hood legend, including a lot of magic and mysticism. I've loved it since I first saw it as a teenager, and I've stayed a fan ever since, going to various conventions over the years. In fact my online name, Ravenscar, comes from one of the episodes. There's a character called Morgwyn of Ravenscar, an Abbess who is in fact a devil worshipper! I own an original prop from the episode, a banner, and that inspired my choice of name.


There hadn't been a dedicated convention for the show for a few years, so when one was announced, to be held this May, I was very excited. I booked up immediately (a couple of years in advance), but then almost forgot about it in the busyness of life. When I started getting ready for it shortly before, I realised I'd left it a bit late to get a costume ready, but I thought I could at least crochet a character or two to take along with me.

I started work on my favourite character, Nasir, a Saracen assassin who joins the group at the end of the first episode (Robin of Sherwood was the first time a Saracen/Arabic character had become part of the band of 'Merry Men', but this idea has since been used in various films and TV series), as the actor who portrayed him, Mark Ryan was going to be at the convention. I used my Elf pattern as a base, and was very happy with my mini Nasir. I did think of making his signature two swords, but I thought he'd be easier to carry around without any accessories.

Mini Nasir with the original for comparison.

Then I began to make Robin himself. He was played by Michael Praed, the only man to grace my teenage bedroom walls (in poster form!), who was also attending the con. Sadly, I didn't quite get him finished before it was time to leave. I took all the parts, that just needed sewing together, but I couldn't manage to do it in the car, it made me feel queasy. However, I finished him up as soon as I got back, and took photos of them both in the greenwood garden.

 
Mini Robin and the original - it took a while to work out how to make that hair.

I was pleased I'd at least managed to finish Nasir though, as I got a photograph with Mark Ryan, along with the mini version. I also had a wonderful time at the convention, and afterwards I helped to start up a discussion forum - Nothing's Forgotten - so I could keep chatting with all the Robin of Sherwood fans.

Halloween Patterns

$
0
0
Are you getting excited for Halloween? It's not such a big thing here in the UK as it seems to be in the US, but I do enjoy a lot of the things associated with it, and it's nice to feel a bit spooky at this time of year. The other day I looked out of the window while I was drawing the curtains and saw a bat flying overhead - I've never seen one outside our house before (and we've lived here for 17 years) so I was really excited. I went outside and it made that perfect bat shape as it went over my head. That's inspired me to work on a little bat pattern, which I'll make available for free when it's ready. in the meantime, here are some of my other patterns that might be fun to make for Halloween.


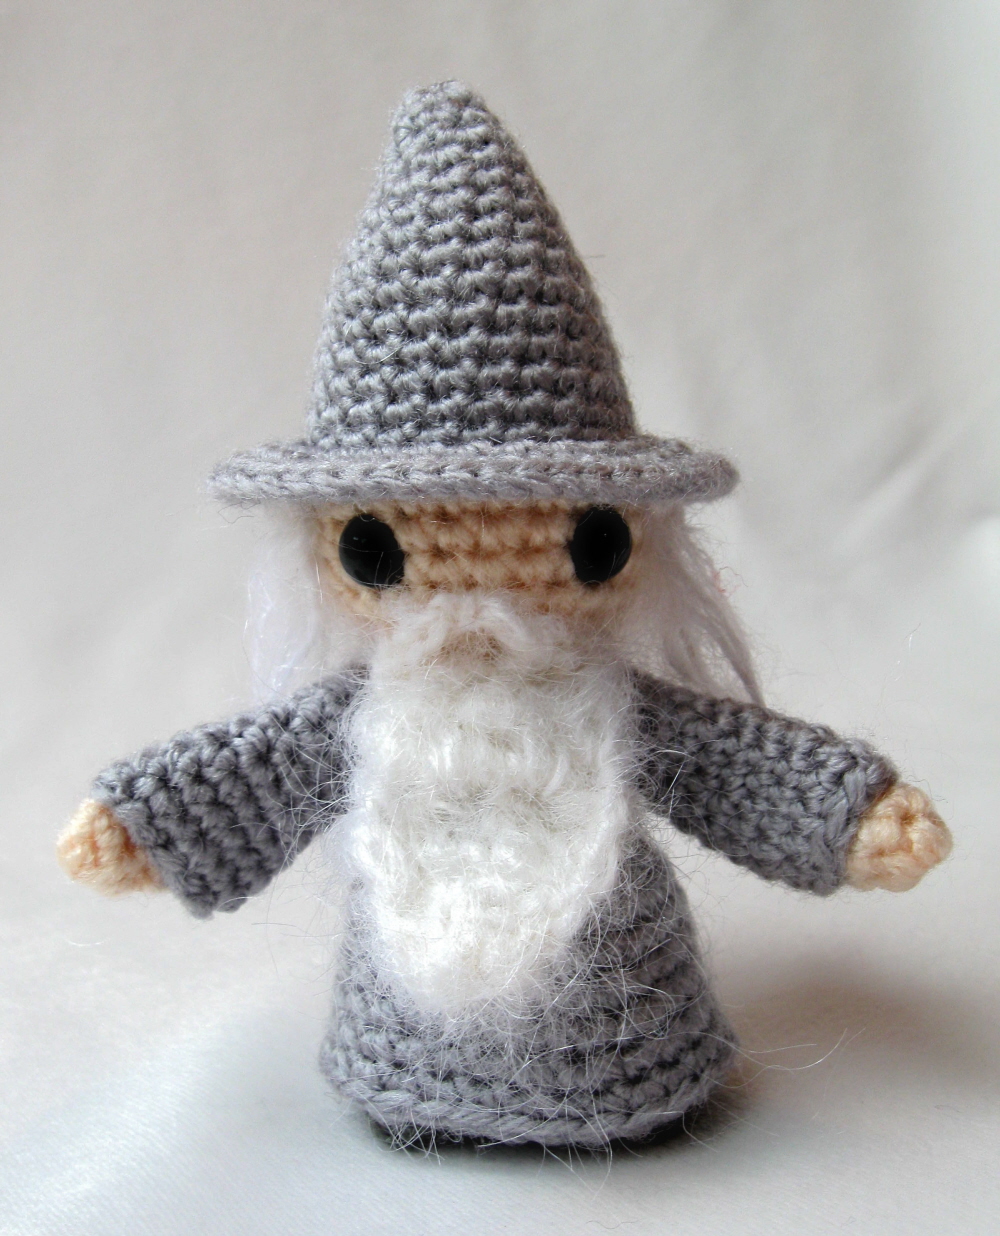
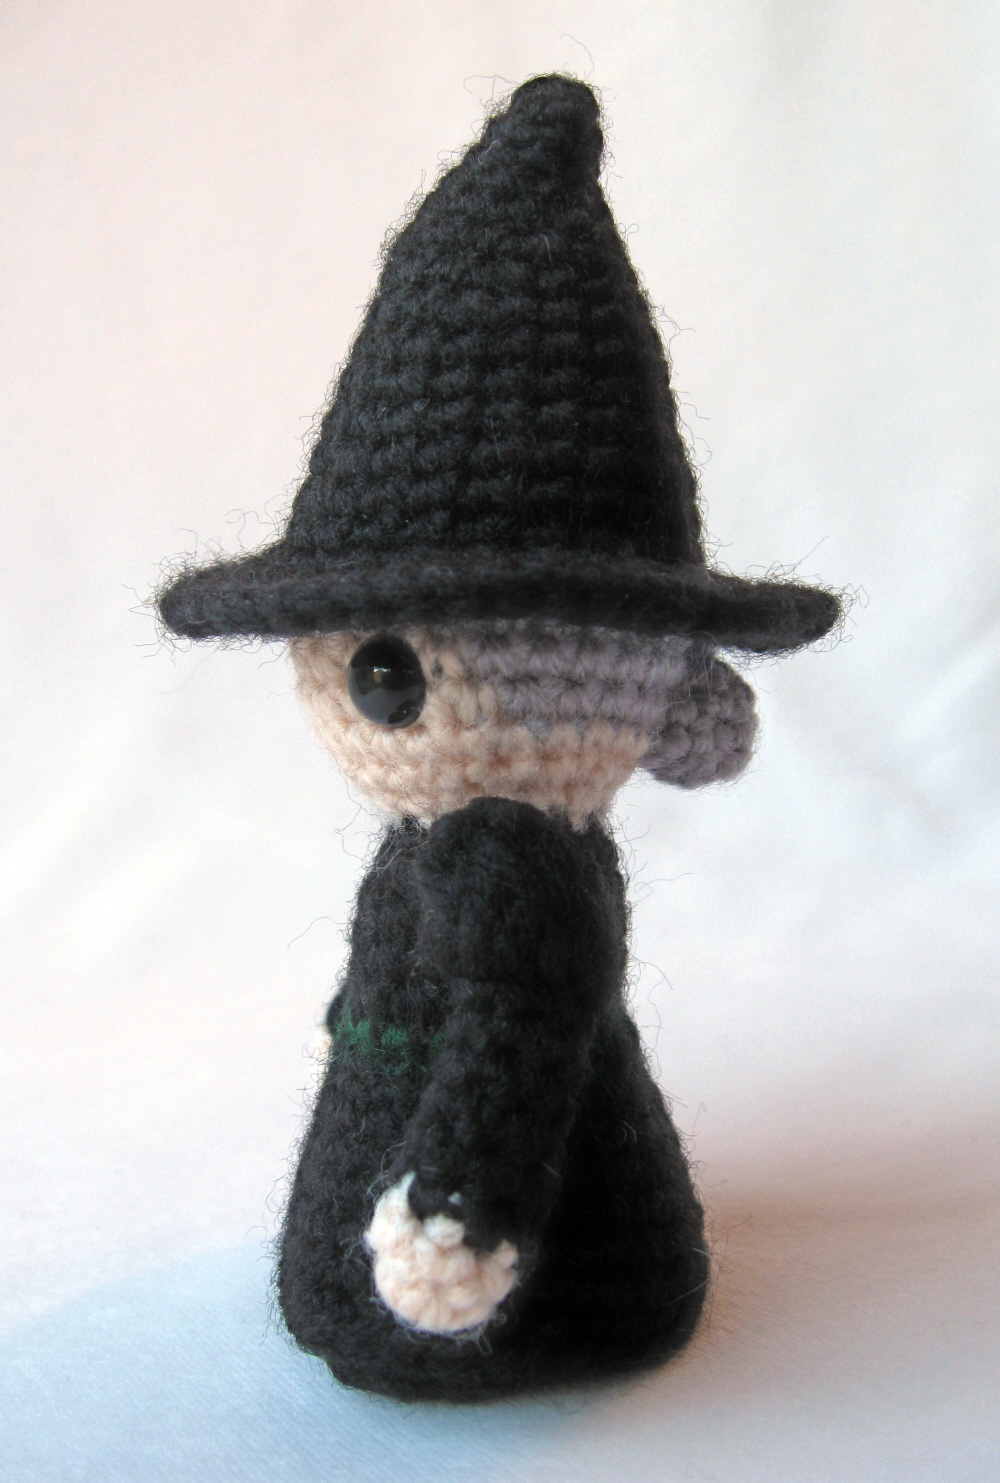
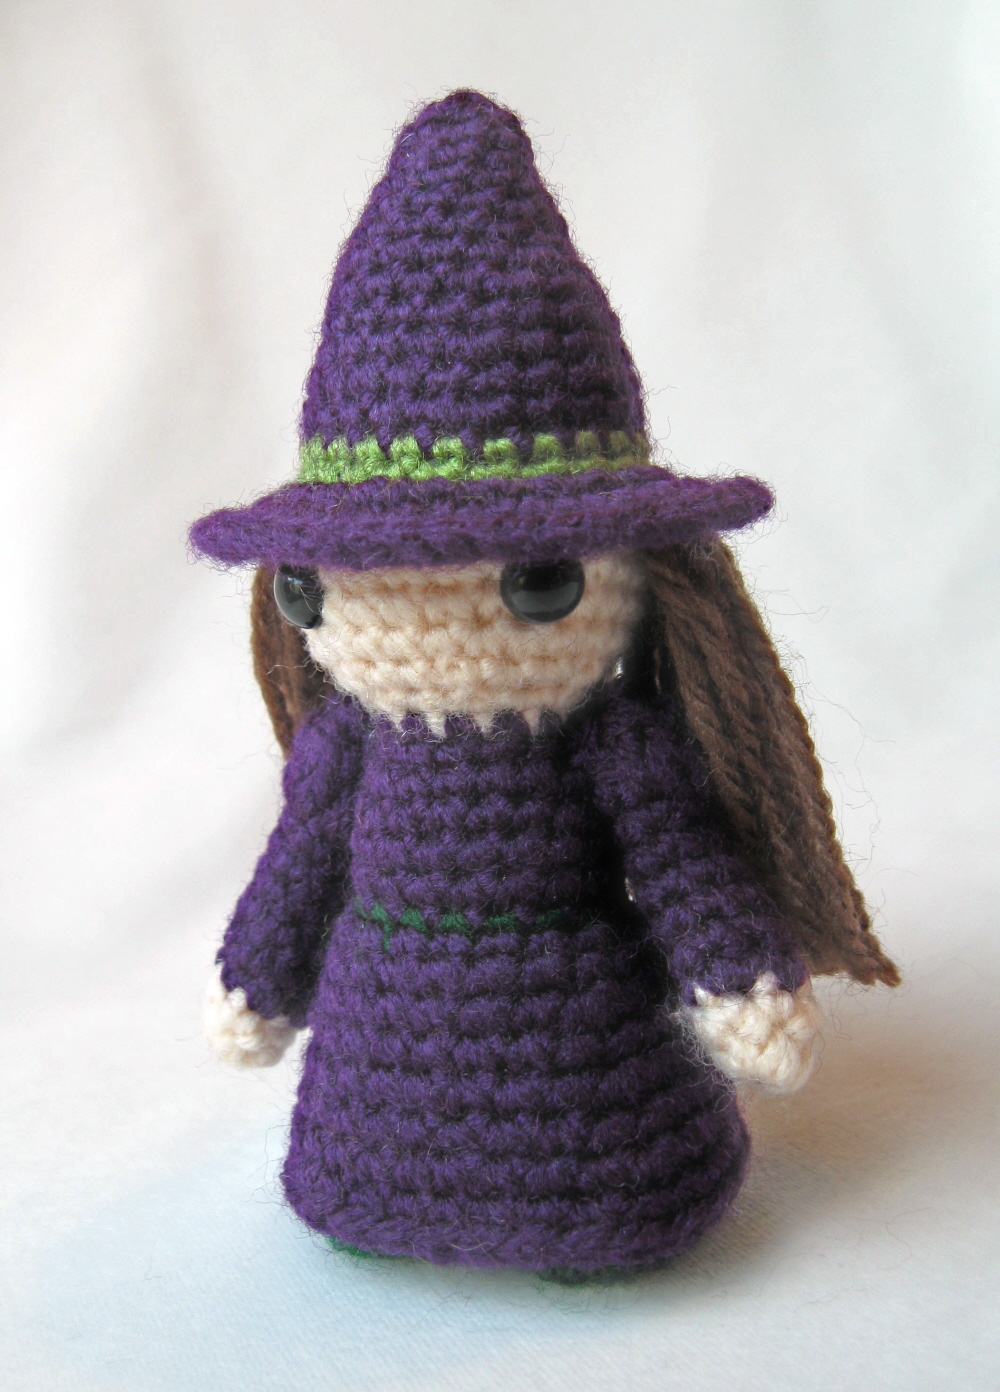
Witch and Wizard Amigurumi Pattern 
Make either a witch or a wizard using slight variations on the same pattern, available in my Etsy  shop.


Witch's Cat and Wizard's Owl
These little animals are quick and simple to make, either on their own or to go with the Witch and Wizard. You can find the free patterns here: Cat and Owl


Mini Frog
There's also this little frog that might be useful for a little present at a Halloween party - here's the free pattern: Mini Frog


Knitting and Stitching Show

$
0
0
On Saturday I went up to the Knitting and Stitching Show at Alexandra Palace in London. I went last year, and enjoyed it, but it was much better this year because I went with my friend Julie - it's far more fun to gush over yarns together than on your own!

Alexandra Palace is a lovely building, and traveling up to it on the free bus gives you a great view across London. I meant to take a photo of the outside but I forgot, however, it looks good on the inside too.


The first thing we saw when we came in the entrance was a pergola absolutely covered in knitted flowers, butterflies and birds. It had been created for Livability, a charity that supports people with various disabilities, and it looked amazing. Here are some of my favourite parts - I especially liked the blue tit hanging on the peanuts.


The show consists of three large halls of exhibitors, with a mix of stands with items for sale, and artworks created using a variety of the crafts that were on show - knitting, crochet, felting, embroidery and sewing. We headed into the largest hall, which boasts a lovely stained glass window, as well as an incredible number of stands filled, amongst other things, with all sorts of lovely yarn!


We were particularly taken by the Stylecraft stand, where the lovely Lucy from Attic 24  was showing off her gorgeous colourful blankets, made with Stylecraft Special DK. They now have packs with all the colours you need to make a particular blanket, and they were doing a roaring trade - it seemed like every other person there was carrying a big pack of yarn away with them!
 
I've bought Stylecraft acrylic yarn before but I haven't found it so good for amigurumi - it's a bit thin compared to other yarns I use - but it does have a very nice feel, and it's perfect to make blankets that are soft and comfortable, but still good for everyday use. However, I used their Alpaca DK to make my Alpaca Family and found it worked really well for amigurumi, with a nice texture. Since I'm working on some more animal amigurumi I couldn't resist buying a selection of colours, and some of the new Alpaca Tweed DK.
 
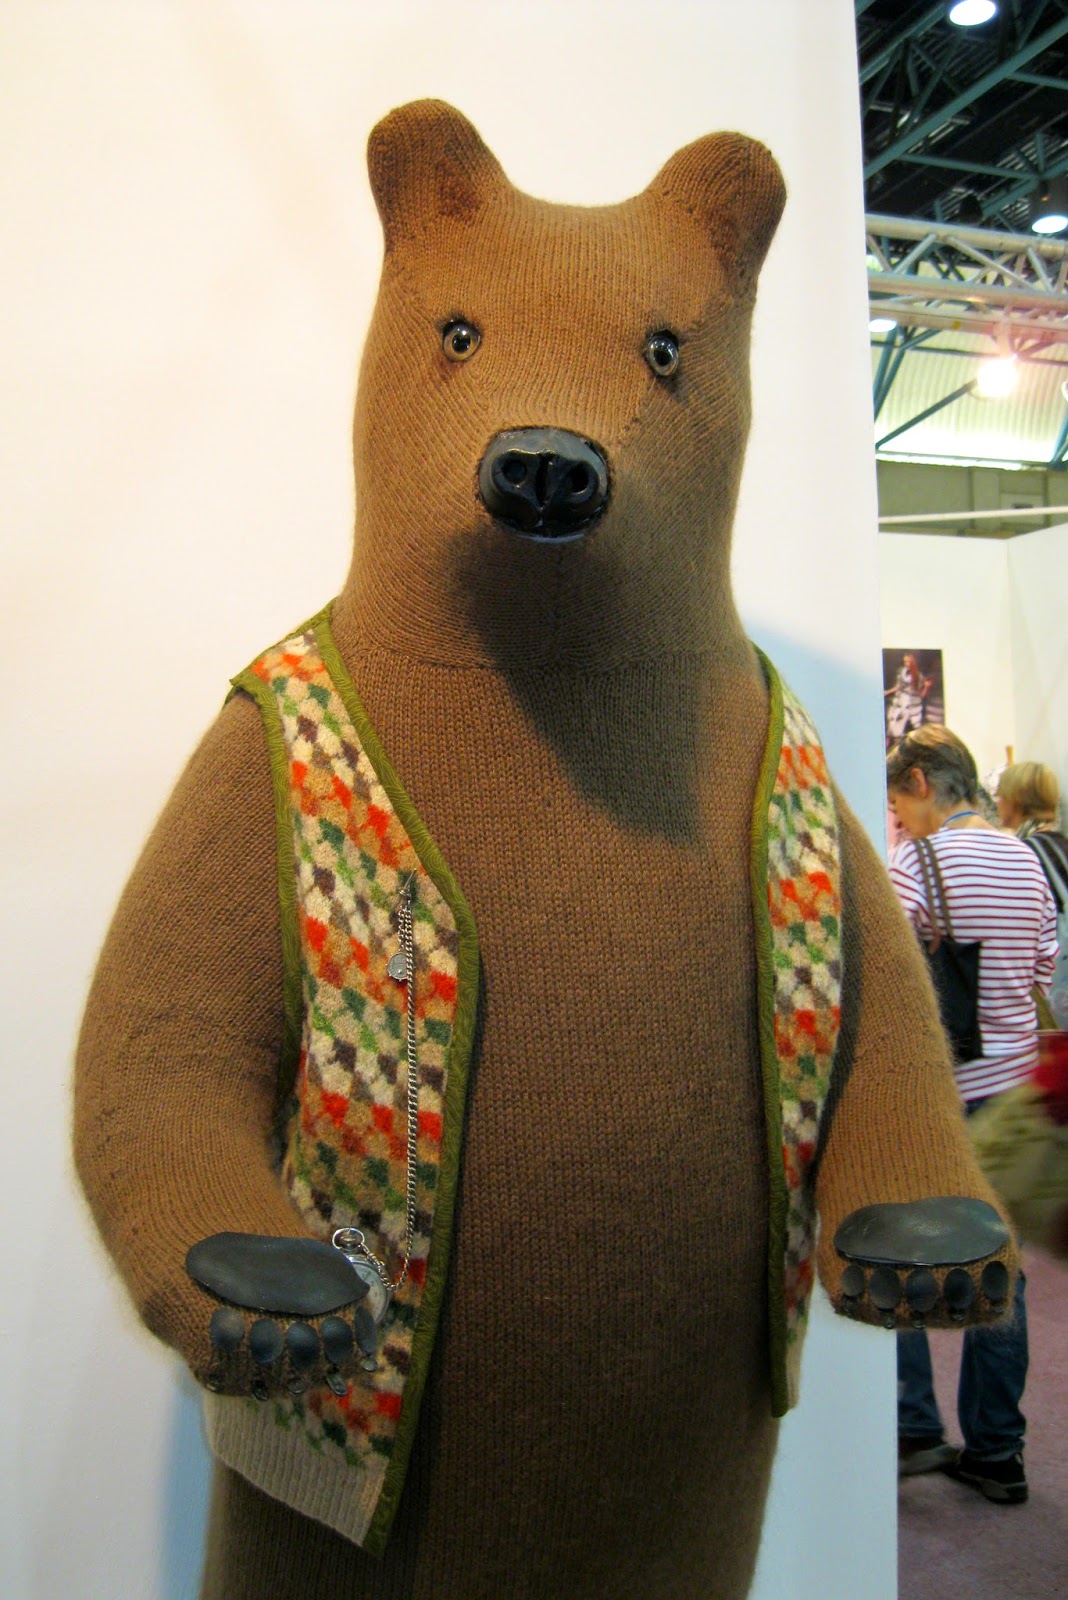
After a bit of lunch we moved onto the other rooms, which had some amazing creations in them, such as these felted skulls and organic shapes (the first two photos are items by Stephanie Metz, I didn't get the details for the others), sculptural crocheted clothes and a life-size knitted bear sculpture.


Given that I'm a massive Tolkien fan, I think my favourite creations were by Denise Salway, The Knitting Witch. She has made the most amazing knitted Hobbit coat, with Smaug flying over the Lonely Mountain and all sorts of details, like a little Gollum peering through the stitches. It has a lovely selection of different textures, and is apparently quite wearable. She has also made lots of characters from the story, including Bilbo, Thorin, Gandalf, Galadriel, Smaug, and Peter Jackson filming them all!
 
Denise Salway with her creations.


 All in all we had a great day, even if we were exhausted by the end. I'm looking forward to next year now!
 

Itty Bitty Bat - free amigurumi pattern

$
0
0


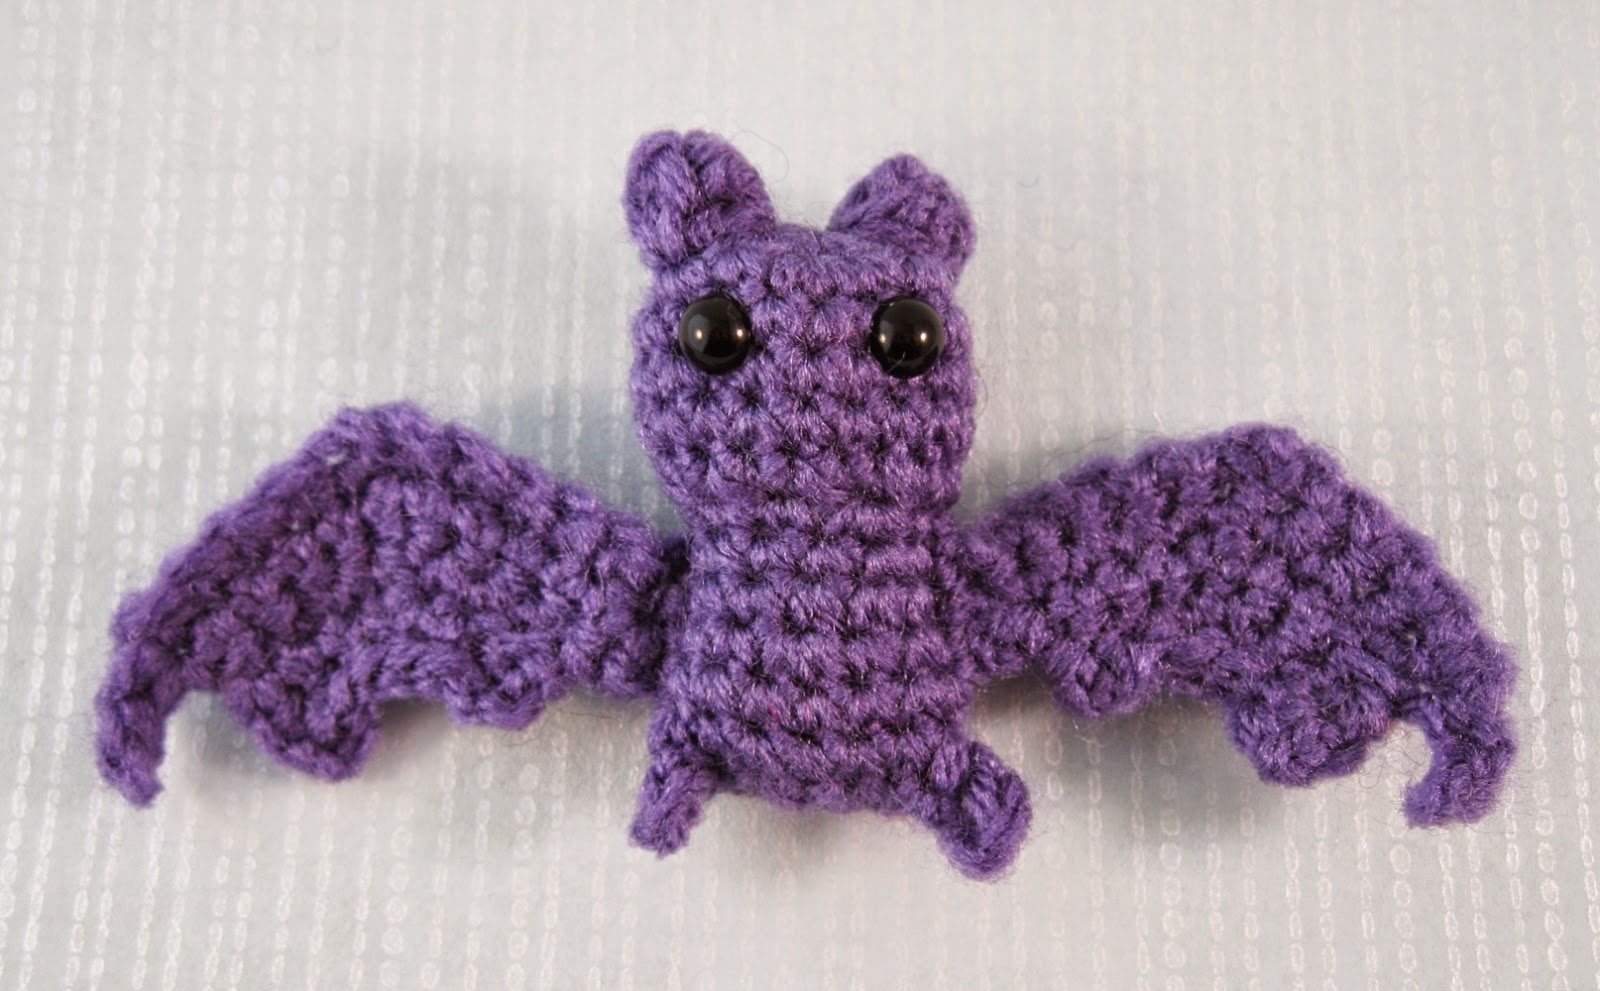
Well, Halloween is nearly upon us, so here is a tiny little bat pattern for you to have fun with. It's quick and simple to make and, depending on the yarn you use, will end up about 2” tall, with a wingspan of about 5”. The feet are actually small loops, so your bat can hang upside down from a small stick or length of yarn or cord. The loops are large enough to fit the crochet hook you are using through, so you can use that to pull yarn or cord through. You could make several bats and hang them up on a length of chained yarn as decorations, or just wear one as a cute Halloween necklace! If you want to hang your bat on something thicker, just do more chain stitches when you make the feet in round 13.

Abbreviations:
ch = chain
st = stitch or stitches
ss = slipstitch
sc = single crochet (US), double crochet (UK)
dc = double crochet (US), treble crochet (UK)
tog = together
sc2tog = decrease by working two sc together
FLO = work in front loop only
FO = fasten off

General instructions:
Work in rounds unless otherwise stated and do not join rounds unless told to. Use a stitch marker to mark the start of a round - a small piece of different coloured yarn placed under the stitch at the start of the round will do. To start a round, you can use the magic ring method, but I prefer (ch 2, work 6 sc into 1st ch). If you work the 6 sc over the tail of yarn as well you can use that to pull the hole tight.

Work through both loops of stitches unless otherwise indicated.

You will need:
Small amount of black, purple or light and dark brown yarn, double knitting or worsted weight.
1 Pair of 7.5mm brown safety eyes, or 6mm black safety eyes, or yarn to embroider them.
Small amount of stuffing.
3.5mm (E) hook.
Tapestry needle.

Special stitch instructions:
5 dc pop: popcorn stitch for ears. Work 5 dc into 1 st, take hook out leaving loop, put hook through 1st dc & pull loop through.


Body:
Start at top of head.
Round 1: Ch 2, work 6 sc into 1st ch - 6 st.
Round 2: [2 sc in next st, (sc and 5 dc pop in next st), 2 sc in next st] 2 times – 12 st.
Round 3: [2 sc in next st, sc in next st] 6 times - 18 st.
Round 4 - 6: (3 rounds) Sc in each st around – 18 st.

If using safety eyes, fit them now between rounds 4 and 5, four stitches apart.

Round 7: [Sc2tog] 9 times – 9 st.
Round 8: [2 sc in next st, sc in next 2 st] 3 times – 12 st.
Round 9 - 10: (2 rounds) Sc in each st around – 12 st.
Round 11: [2 sc in next st, sc in next 3 st] 3 times – 15 st.
Round 12: Sc in each st around – 15 st.
Round 13: Sc in next 8 st, [foot: ss in next st, ch 4, ss back into same st], sc in next 5 st, [foot: ss in next st, ch 4, ss back into same st] – 15 st (the first ss used to make each foot counts as a stitch, the second one doesn’t).
Round 14: [Sc2tog, sc in next 3 st] 3 times – 12 st.
Ss in next st then FO, leaving a length of yarn. Embroider eyes if you haven't used safety eyes. Stuff and use yarn to sew up the bottom in a line between the two feet.

Wings (make 2):
Ch 15, turn.
Row 1: Ss in 2nd ch from hook, sc in next 6 ch, miss next ch, sc in next 6 ch, ch 1, turn.
Row 2: 2 sc in next st, sc in next 10 st, turn.
Row 3: Miss 1st st, ss in next st, sc in next 3 st, miss next st, sc in next 4 st, turn.
Row 4: Miss 1st st, ss in next st, sc in next 2 st, miss next st, sc in next 3 st, turn.
Row 5: Ch 2, sc in next st, ss in next 4 st, ch 2, ss in next st.
FO, leaving a length of yarn. Work this yarn through to the end of the wing and use it to sew the wing to the body.


My first cushion cover

$
0
0

Since I started to crochet, I've pretty much stuck to making amigurumi. I've made a few hats and scarves, but I've never made a granny square, or attempted an afghan/blanket. I've seen so many lovely patterns, and really felt the need to have something I'd crocheted sat around in my house so I could enjoy it all the time. Rather than starting on a blanket, I decided to make myself a cushion cover, so I could try out some ideas without committing to something so big.

I had a look at a lot of patterns, and tried a couple of granny square designs, but I felt that they were too holey, and I didn't want my cushion pad to show through. At least they'd given me the idea of how to make a square shape, so I came up with a very simple square that didn't have many holes, and that used three colours.

Then I searched through my stash for a selection of twelve colours that would match my sitting room; mostly reds and dark pinks and greens with a bit of beige, gold and yellow. I have lots of different colours in my stash (I barely have two balls of yarn the same), so it wasn't difficult to find what I wanted. I really enjoyed working on all the squares, trying to make each one unique, and not to repeat each colour too many times. I nearly always crochet in the evenings, and usually I'm trying to work on one of my patterns, but I'd got to a stage on my latest pattern (which is very nearly ready) where I only needed to take photos and write up my notes. It was nice to be making something for myself, and more relaxing.


I decided to make thirty-six squares, though when I finished them I was worried they'd be too big when sewn together. Luckily it came out just about right in the end, and I did one row of single crochet (UK double crochet) in red around the edge to neaten it up. I thought it would be nice to try a different look for the back, so I did alternating rows of single crochet and double crochet (UK double crochet and treble crochet) using all the colours except the red, then I used that to form a border. I found enough matching pink buttons from the collection I inherited from my husband's great aunt, and then all I had to do was sew the two sides together and stick the cushion pad in.


I'm really pleased with it, it goes nicely in the room, and my sons really like the fact that I made something to go in the house. Now I need to make a blanket - I've already bought lots of colours of Stylecraft yarn - so I'll have something to do with any spare time over the rest of the winter!

Mini Pets - Snails, Bugs and Frogs amigurumi patterns

$
0
0
My latest pattern, or rather set of patterns, to make tiny amigurumi snails, beetles, spiders and frogs, is now available in my Etsy shop and Ravelry. The creatures, which are quick to make with minimal sewing, also come with the details to make a toadstool play mat and hollow log.


As a child I loved and was fascinated by all types of animals, and was keen to have all sorts of pets, that weren't always practical. I did keep snails for a short while, and repeated the experience with my children. They make great temporary pets, you just find some in your garden and put them in a plastic pet box with some soil and greenery keep them damp and fed, and then return them to the garden after a few weeks.


However, not everyone wants various creepy crawlies in their house, and so for a more cuddly alternative I designed these creatures, so that the little animal lover in your house can play with them any time they want. You can make snails, two different shapes of beetle, including a ladybird (ladybug), spiders with various patterns on their backs, and tiny baby frogs. Their sizes range from 1.5" to 2.5" long.


You can keep them in a jar or matchbox, but you can also make them a grassy mat for them to play on, with a toadstool in the middle, and a hollow log to climb in. It has a drawstring around the edge so you can turn it into a bag and keep everything safe.


Of course, you can do all sorts of things with these creatures. It's easy to turn them into key chains, or put small magnets inside as you crochet them to make them into fridge magnets. The beetles would make unusual brooches, the spiders are great for Halloween accessories, and you could make the frogs in sets of different colours and use them as game pieces. You can make them as party favours, or stocking fillers, or make lots for a school or church fair. Whatever you do, I hope you'll have fun with them!

Bracken the Fox

$
0
0


I love foxes. I don't know what it is, maybe it's their beautiful colouring or something about the confident way they hold themselves, but I'm always really excited when I spot one on a walk. I've had two, possibly young ones, practically run into me as they chased each other across my path, but usually when I see them they just sit nonchalantly a little distance away (usually behind a fence) and stare at me.


I've been meaning to crochet a fox for ages, to be honest I don't know what delayed me, just lots of other ideas that I wanted to try out, but I've finally done it. Meet Bracken the Fox, named after the ferns that turn a lovely russet colour in the autumn. I've made him in two versions, with and without a sweater, and he's about 30cm (12") tall.


I've made a lot of my amigurumi in the past using totally acrylic yarn, but I decided to use yarns with wool and alpaca in to make Bracken, to give him a nicer texture. I mostly used Stylecraft Alpaca, and their newer Alpaca Tweed for the sweater, which is lovely and soft.


The pattern is now available in my Etsy shop and on Ravelry.

Little Kissing Mice - free amigurumi pattern

$
0
0


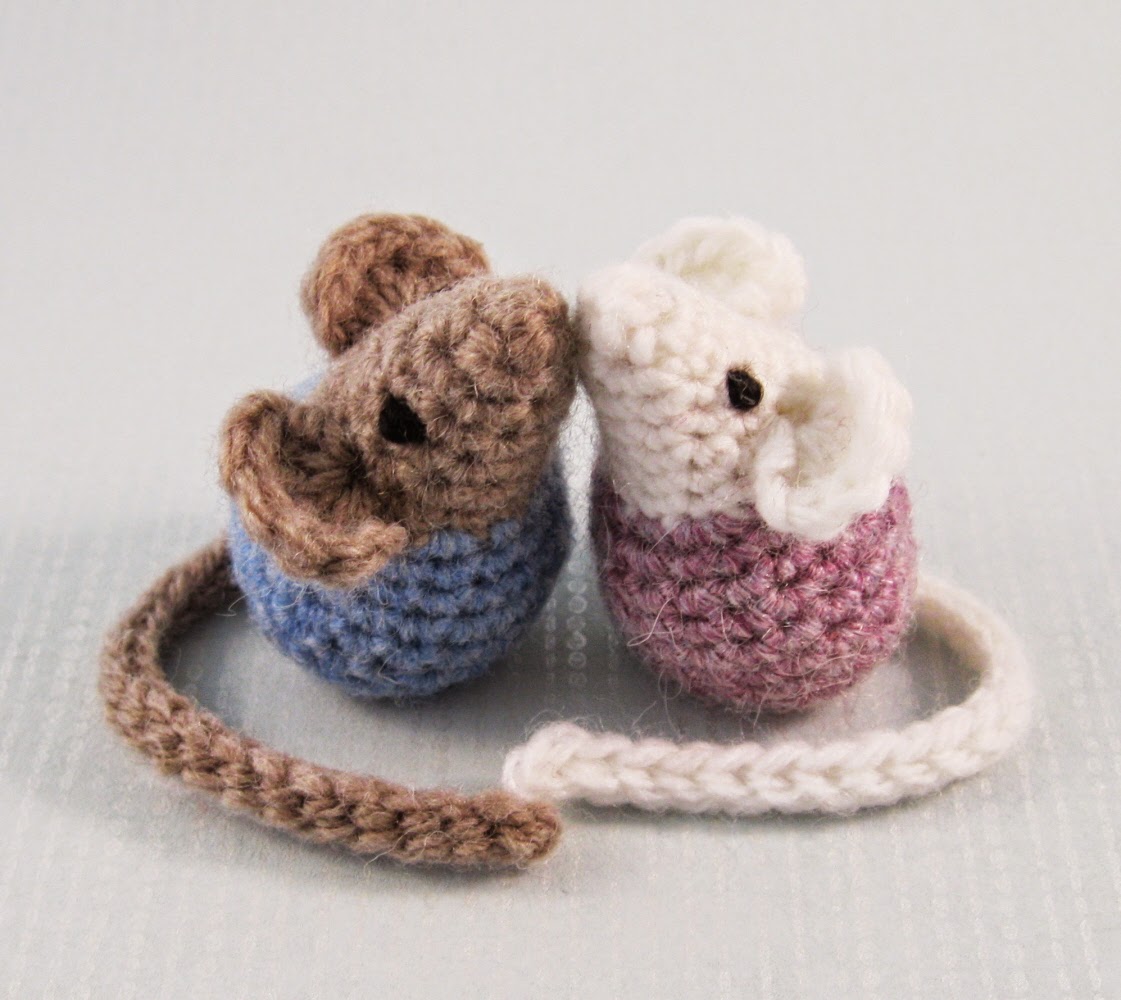
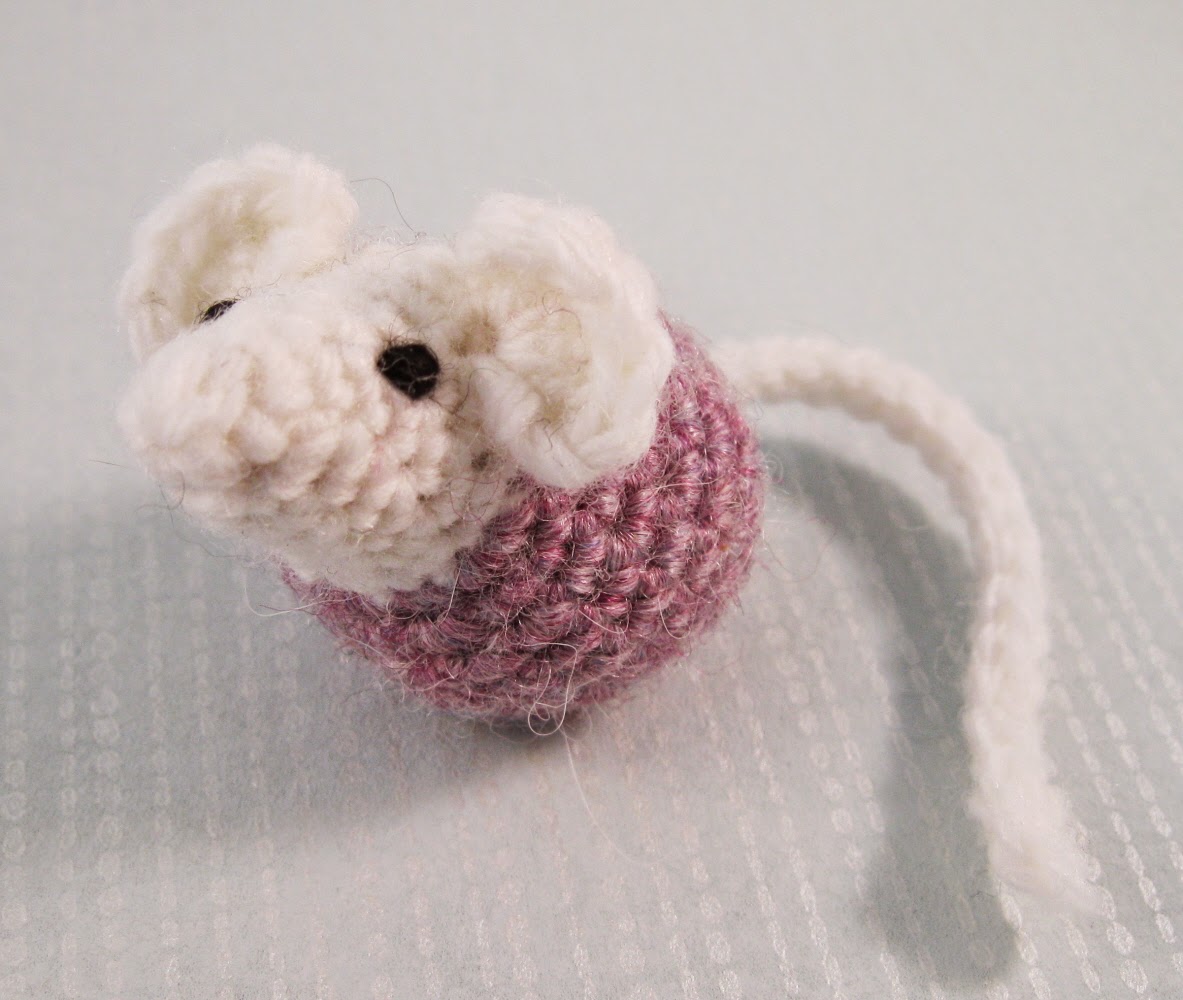
Here’s a pattern to make a pair of sweet little mice that just love to kiss, perfect to make for Valentine's Day. They are made all in one, with no separate parts to sew on, so they are quick and easy to crochet. Make them in any colours you like, you can make them totally in a natural fur colour if you want, or choose any colour for their bodies. They will sit upright on their own, but they like snuggling up to each other even more.

 
Abbreviations:
ch = chain
st = stitch or stitches
ss = slipstitch
sc = single crochet (US), double crochet (UK)
dc = double crochet (US), treble crochet (UK)
tog = together
sc2tog = decrease by working two sc together
FLO = work in front loop only
FO = fasten off

Approximate size: 5cm/2" long without tail.

General instructions:
Work in rounds unless otherwise stated and do not join rounds unless told to. Use a stitch marker to mark the start of a round - a small piece of different coloured yarn placed under the stitch at the start of the round will do. To start a round, you can use the magic ring method, but I prefer to ch 2, and work the appropriate number of sc into 1st ch. If you work the sc over the tail of yarn as well you can use that to pull the hole tight.

When changing from one colour of yarn to another work the stitch before the change until there are two loops left on the hook. Then use the new colour for the final yarn over hook and pull through.

Stuff as you go along.

Work through both loops of stitches unless otherwise indicated.


You will need:
Small amounts of yarn in a natural colour for the head and tail, and any colour for the body, double knitting or worsted weight.
Small amounts of black yarn to embroider eyes.
Small amount of stuffing.
3.5mm (E) hook.
Tapestry needle.


Start with natural colour yarn.
Round 1: Ch 2, work 4 sc into 1st ch - 4 st.
Round 2: [2 sc in next st, sc in next st] 2 times - 6 st.
Round 3: [2 sc in next st, sc in next 2 st] 2 times - 8 st.
Round 4: [2 sc in next st, sc in next 3 st] 2 times - 10 st.
Round 5: Sc in each st around – 10 st.
Round 6: [2 sc in next st, sc in next 4 st] 2 times - 12 st.
Round 7: Sc in next 6 st, [ear, in FLO of next st: ss, ch 2, 5 dc, ch 2, ss], sc in next 3 st, [ear as before], sc in next st – 12 st (counting each ear as one st).
Round 8: Sc in each st around, working into the back loop behind each ear – 12 st.
Change to yarn for body.
Round 9: [2 sc in next st, sc in next st] 3 times, sc in next 6 st – 15 st.
Round 10: [2 sc in next st, sc in next 4 st] 3 times – 18 st.
Round 11: Sc in each st around – 18 st.
Round 12: [2 sc in next st, sc in next 5 st] 3 times – 21 st.
Round 13 - 15: (3 rounds) Sc in each st around – 21 st.
Round 17: [Sc2tog, sc in next 5 st] 2 times, sc2tog, sc in next 2 st, change to natural colour yarn, [tail:ss in next st, ch 20, miss ch next to hook, ss 19, ss back into original st and change back to body colour yarn], sc in next 2 st – 18 st.
Round 18:Sc2tog 2 times, sc in next 6 st, sc2tog 4times – 12 st.
Round 19:Sc2tog 6 times – 6 st.
FO, leaving a length of yarn. Finish stuffing and use black yarn to sew eyes. Sew up bottom of mouse neatly.


Little Monkey Amigurumi

$
0
0
For my latest amigurumi pattern I've designed a pair of cute little monkeys, a boy in a top and trousers, and a girl in a dress with puffed sleeves.


They are about 13 cm/5" tall, which I think makes them the perfect size to carry around and play with. They're made with the legs worked continuously from the body, and they stand up on their own, so you can have them standing on your shelf or desk if you want.


I've made them in a selection of different colours for the fur and the clothes to show the sort of variations you can choose, but of course, you can pick any colours you like to make them.


I'm intending to make a range of different animals using the same basic pattern, in different styles of clothes, so if you have any ideas about what you'd like to see, do let me know in the comments.

Star Wars Crochet Kit

$
0
0

 
Well, my Star Wars Crochet kit is finally out, at least in the US.

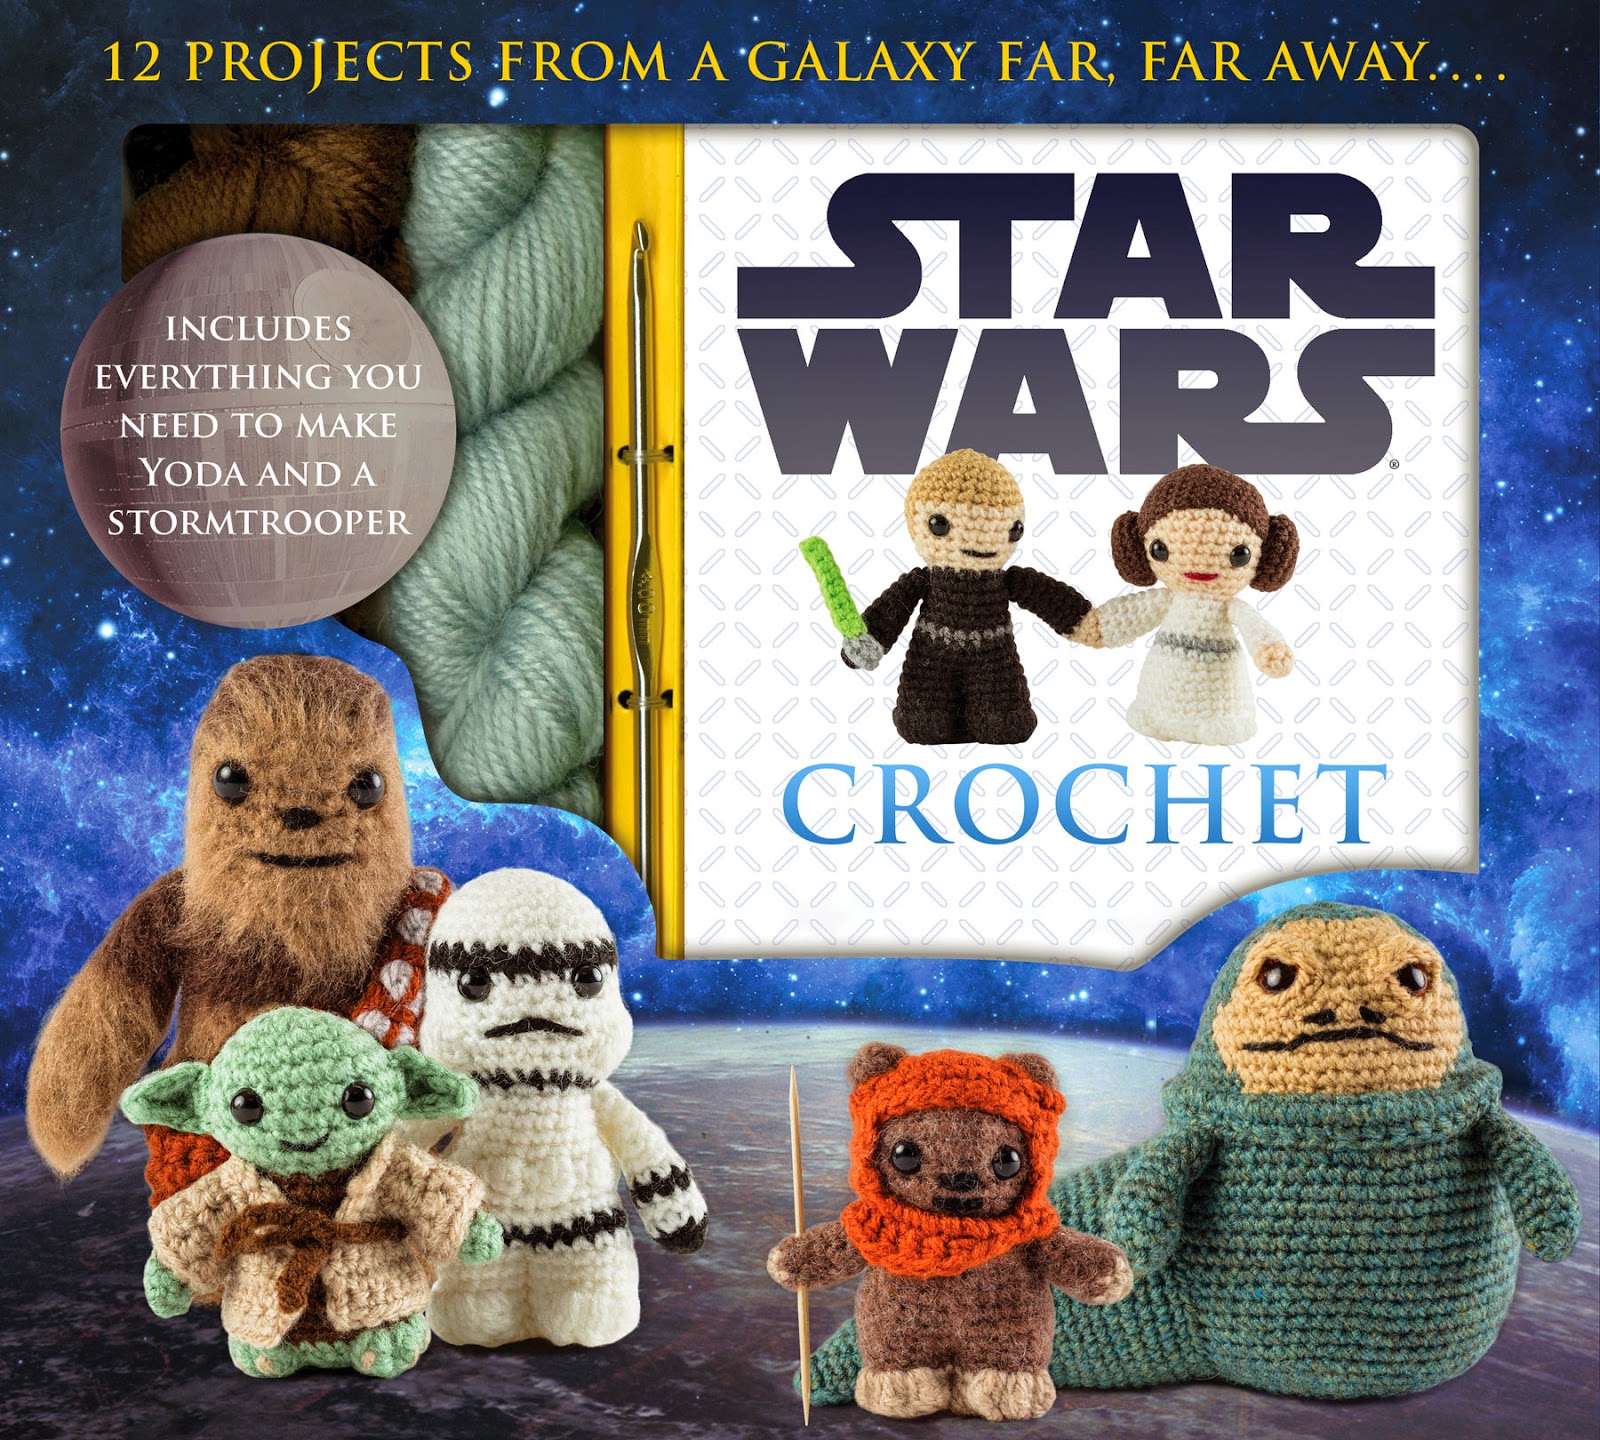
The kit contains a book with the patterns for 12 Star Wars characters - Boba Fett, C-3PO, Chewbacca, Darth Vader, Wicket the Ewok, Han Solo, Jabba the Hutt, Luke Skywalker (Jedi), Princess Leia, R2-D2, Stormtrooper and Yoda - as well as the yarn, hook and eyes to make Yoda and the Stormtrooper.
 
The kit is published by Thunder Bay in the US, you can find it listed onAmazon, although it will be available in other stores. It's also due to be published shortly in Australia/New Zealand by Hardie Grant under their Chirpy Bird imprint. Hopefully it will be released in other countries too, but there's no information about that at the moment. It is listed on Amazon UK though, due out in May.

 
It's really exciting to see my patterns made into a book like this. I love the photographs of the characters, mixed with stills from the films in the book, and it was wonderful to be told that Lucasfilm were thrilled with the way the book came out!


Lovely new yarn storage

$
0
0
Until recently I've never had anywhere good to store my yarn - we don't have any spare rooms and so I've kept my stash in large plastic storage bags stuffed into my understairs cupboard. This meant that every time I wanted to choose some yarn for a new project I had to pull out all the other things in the cupboard - vacuum cleaner, walking boots, spare plastic bags, etc - then pull out several storage bags until I found the right colours (they were mostly sorted by colour). Then I carried the bags into another room so I look through all the yarn. This was all very frustrating, so I was very happy when we decided to get a new outbuilding constructed, replacing our old, leaky garage and shed, as it meant I would have some space for some decent, clean storage for my yarn.


The building was finished in March, then we had to decorate (very simple white paint throughout) and go on a couple of trips to Ikea to kit it out. I hadn't been to Ikea for years, so I had a wonderful time finding all sorts of bits and bobs, both for the Spare Oom (named after Mr Tumnus' confusion about where Lucy comes from in The Lion, The Witch and the Wardrobe) and the rest of our house. I wasn't really sure how much storage I would need, but the building is multipurpose, so I couldn't fill it wall to wall with wool! In the end I bought the largest Kallax shelving unit, and twenty-five fabric storage boxes to fill it up, which was just enough to get all my yarn in.


I spent a happy afternoon sorting all my yarn into the various boxes. The top two rows are all my acrylic dk that I mostly use for amigurumi, sorted by colour. Then I have a couple of boxes with wool and alpaca mix yarns that I've started to use more recently. The rest of the boxes are filled with different types and weights of yarn - cotton, mohair style, eyelash, chunky and 4 ply. This is the stuff that I don't use for my amigurumi patterns, so it had ended up at the back of the cupboard, almost impossible to access, so it was a treat to see it all again! Now, whatever yarn I'm looking for, I can just pull out the appropriate box and sift through it to find what I want. So I can tell what is in each box, I've crocheted little circles of the appropriate colours or type of yarn and pinned them on the front.


All this lovely organisation makes planning a new pattern so much easier, and I'm trying new projects with different yarns that I've never done before. I bought some plants from Ikea to put on the windowsills, and I used my newly discovered cotton yarn to make brightly coloured doilies for them to sit on - the very first doilies I've ever made - using this pattern. I've also selected lots of different colours of dk yarn to practice Tunisian crochet, making a cushion cover for the little sofa in the Spare Oom - more on that in a future post when it's finished.


On top of the shelves I've got three plastic boxes full of all my completed amigurumi. These used to be up in the attic, so they were a real hassle to get to if I needed to check something. As well as the Kallax shelving I bought a Billy bookcase in case I needed more storage. I don't need it for yarn (at the moment), but it's great to store all my crochet magazines and books. Now I can just sit there and browse through them when I'm looking for inspiration. At the moment I've filled the spare space with all my bags that I keep current projects in, and arranged a few of my amigurumi on a shelf to cheer me up. I also just bought a cool Hobbit-themed storage box - not sure what I'm going to store in it yet, but it was too much fun not to buy!


As you can probably see from the photos, the colour scheme is a white background with lots of bright colours in contrast, like the button design rug I chose from Ikea. We haven't quite finished in there yet, there's still a magnetic noticeboard to put up, that I can fill with inspirational pictures, and a couple of bits of Star Wars wall art. I think this room will end up with all the quirky things in it - we have a clock made from a squashed beer bottle to hang up yet, and a friendly Mountie that was a gift from our Canadian relatives waves at people through the front window. But for now, I'm just relishing being able to find whatever yarn I want, when I want it!


Viewing all 126 articles
Browse latest View live